I found this book at my library. Colorful Stitchery, Kristin Nicholas.
The idea of doing up felt bookmarks as a showcase for new stitch trials or for ‘practice’ canvas was a wonderful idea. It’s a great way to spend some time stitching on a quick and easy project that can be very useful as well as adored, hopefully, by someone that would love to give it a new home!
I posed a question on a group that I frequent, [Yahoo Group, Hand-Embroidery], asking about the backing of such a bookmark. Some people think a felt bookmark could be left with its ends showing on the reverse, some think another piece, also stitched, could be bound to the front, some think a grosgrain ribbon or the like could be attached to the back…some even think fusible pellon might work out alright.
I told them there that I would try them all and see what the results were like. (There were some concerns about the thickness of even one felt, let alone a felt plus a backing.)
Let’s see what happens! Join in, have some fun.
Find all the felt stash and lay them all out so that it’s easy to choose a few bookmark colors. I have them separated by color family here not only for the photo…but also because I am colorblind…Did I mention that? lol (It’s mostly shade differentials, but sometimes it’s full color families too)
Pull a few sheets that will be fun and cheery… gather the felt choices. Get out the cutting tools. Here are rotary cutters, rotary cutting mat, and quilt ruler.
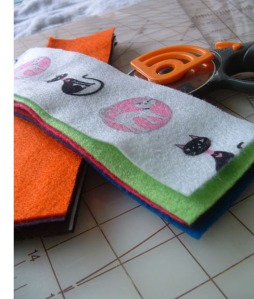
To cut them, stack them, I tried 5 at a time. Here are the stacked felt choices.
Then, take the see thru quilting ruler and measure off the width of your bookmarks. I measured off to 2.5 inches in width for the bookmark stack. ( In the picture it gauges as 3.5, but I lined the edges up at the 1 inch mark, to have 2.5 inches net.)
Hold the stack firmly under the quilt ruler, cut the stack with the roller.
Here are the stacks, all cut at 2.5 inches.
I have these books to use. I think that I will find a few stitches that may look interesting and start by choosing a stitch and a color for the bookmark.
And now…off to stitch. I wonder what creations await ahead…
I hope you join in! Let’s try it together. I’d love to hear from you and see your photos. Your life needs fun. Go ahead, have some fun!


 Stumble It!

I love your embroidery’project. Me also, I love felt, fabric, ….
Glad you love it! I hope you make some too and share your photos and stories as you make them.
smiles, alicia in Hawaii
Pingback: Embroidery Project -Celtic Knot Embroidery- Miniature Messenger Bag for Animation Puppet-Part 1 « Curiosities 808
Pingback: Quick and Easy Embroidery Project- Embroidered Felt Bookmarks Part 4, Sublime Stitching and Grossgrain Ribbon « Curiosities 808
Keep up the good work, bookmarked and referred a few friends.
Thanks Sonicrafter!
Hope to see you often.
smiles,
alicia in Hawaii