I got the little snails on the white felt today! (If you didn’t see the beginnings of the snail project, I’ve listed the link(s) at the end of this post.)

Here are the snails that I found over at Flickr Group Hoop Love Vintage Transfers. I printed them with my printer, all on one page, and all on a sheet of plain printer paper. The designs are reversed so all you’ll have to do is trace this printed side with a transfer pen or pencil.

Here, you can see that the designs are sized to be 2.5″ by 3″ each.

This is the first time I’ve ever used a Sulky Iron-On Transfer Pen. I bought this one online at http://www.joggles.com. My order was completed, packaged and shipped within 1 day and I received my box via USPS Priority Mail (to Hawaii) within 3 days! I am very happy with Joggles and would recommend them to anyone looking for sewing or embroidery supplies. 😉 (I’ve already sent a second order to them…they sell felt!)
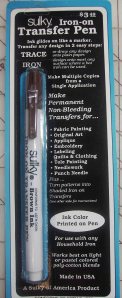
Test the pen. Follow the manufacturers directions and get the pen started. Here you see the nib mark that starts the ink along with a couple of trial scratches to see how wide and dark the lines will be. I’m impressed already!

Here are 2 snail designs traced with the Sulky Iron-On Transfer Pen.

Now, to get some fabric! The fabric can be 3″x4″, which you can see here. The ruler shows the outer edges of 3″x4″ and how the design can be centered on a fabric that size.

As I posted in Part 1, my idea was to create this in economical felt, just to prove that ANYONE can create something with embroidery, no matter what your economic spending level is. This is just a white felt rectangle bought at a craft store. There is nothing fancy about the craft felt. You can create your pieces on any fabric or felt that you’d like to try. I’d like to hear about a few trials on other fabrics.

Here are 6 little 3″x4″ rectangles of white felt to transfer the snail designs onto. Yes, the snails are a Days of Week snail set, and yes, there are 7 snails. I am saving the “Shop Day” snail design for a wallet. 😉

Here the design is ready to place on the felt fabric.

Here the transfer is design side down, centered on the felt fabric. ***I cover any exposed fabric with a thin cloth to protect the fabric from the hot iron.***

Place the hot iron (cotton setting) over the transfer. Don’t rub it around. I just let the iron sit there on top of the transfer for a while. I am usually taking pictures…lol…so I snap 4 pictures or so before I “peek” at the transfer. I would say that I leave the iron sitting like this for at least 30 seconds.

Move the iron over just a tiny bit and just “peek” at the corner of the transfer. Did the ink transfer dark enough onto the fabric? If so, you can lift the iron. If not, just put the corner back down and put the iron back onto the transfer to wait a bit longer. *I’ve never had to wait a second time yet…lol*

Here, you can see that the Sulky pen is GREAT! The transfer to the fabric is dark and very readable. I really like this pen!

I did the exact same process to get all the snails on each of their little felt rectangles. Now, yes, it’s time to get the crayons!
Your life needs fun. Go ahead, have some fun!
———–Helpful Information———
Find Small Snail Purse/Bag with Vintage Snail Embroidery Part 1 (Click Here)
Find My Iron On Transfer Tutorial (Click Here)
Find Flickr Group Hoop Love Vintage Transfers (Click Here)
Find Yahoo!Group Hand Embroidery (Click Here)
Find Hand Embroidery Group Blog (Click Here)
Find Hand Embroidery Group Summer Creativity Challenge (Click Here)
Find Stitchy Britches Blog (Click Here)
Find Sue of Berkshire Cottage (Click Here)
Find Helen of Show Your Workings (Japanese Knot Bag Tutorial) (Click Here)


")


 Stumble It!

