Category Archives: tutorial

Tutorial ~ Nostepinnes: How to Wind a Center Pull Yarn Ball and Yarn Parking

The Nostepinne

I like all kinds of creative avenues!  Yarn fun, like, Spinning, Dyeing Wool, Knitting, and Crochet are part my adventures. Woodworking also is in there, and my woodworking creations lend many hands to tools.

I thought that people might like to see how I use my tools with yarn.

A Nostepinne is useful for winding a center pull ball, especially when the yarn/thread is thin or the total amount of yarn is not enough to make a ‘jumbo’ ball. However, even an abundance of yarn can be hand wound, if necessary, and with a Nostepinne, the job is much easier than using no ‘core’ or center to keep the middle section open for the ‘pull center’ to freely flow from the yarn ball.

Here I am using my ‘mini Nostie’ to wind a mini handpainted yarn skein for a mini sock.

Hold the Nostie, working end out.

Hold the end with thumb, this will be the center pull start so do NOT lose this strand. It is important to keep hold on this end. I have lots of slack beyond my thumb, to ensure that this end does not get lost.

Wrap around the end of the Nostie for an inch or two. This is a mini Nostie making a mini ball, so I wound it just about an inch.

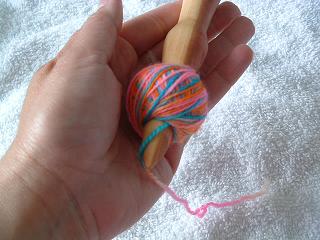
To start the crosswise winding, wrap the yarn up to the top right of the straight wraps, bring the yarn around the Nostie and back to the lower left of the straight wrap. This makes a diagonal line across the straight wrap.

Continue to wrap the diagonals, while turning the Nostepinne around so the the next diagonal sits on the top of the previous diagonal.

Continue those diagonal wraps as the Nostepinne turns to let the next wrap rest above the previous one.

Voila! The ball is done. All the yarn is wrapped. There is the ‘center pull ball’. However, the ‘pullable’ side is facing the handle, and I want it to face off the ‘end’ of the Nostepinne. So, I slip it off the end and turn the ball around, then slide it back onto the point of the Nostepinne.

Here it is, turned around so that the ‘pullable’ side is facing the end of the Nostie, ready for that side to get on the needles or hook.

Here is the center pull ball, parked, ready to use!

———————————————————

I also use my Nostepinnes to “park” my yarn.  😉

I’m knitting a pair of Kilt Hose for my son. I’ve got 2 socks on 2 circulars, the ball of wool is a natural color, and I’m working it from both ends of the ball. The ball is parked on the Nostie the center pull yarn is attached to one sock, the other yarn that unwinds from the exterior of the ball, is attached to the other sock. When it is time to ‘flip’ the needles, I simply ‘flip’ the Nostie…the yarn never tangles.

Here, I have set up 2 balls of yarn, each on its own Nostie. I am currently working a swatch on the one shown here. To work 2 socks from 2 different balls of yarn, park each ball on their own Nostie. The center pull is attached to the knitting work.

Here, I have a commercial yarn ‘parked’ on a Nostie. (Yes, I sometimes have commercial yarn to work with)
I was swatching with the needles, so I had them detached already from the work, but you can see that the pull center is coming off the working end of the Nostie, going to the needles and the project.

With all of these, when I need to clean up or put any of this away, I simply lift the Nosties and the project and place them all in a project bag. The yarn never tangles or collapses in on itself. The projects are kept neat and simple.
My hubby and I have so much fun making the Nostepinnes. We have our one of a kind handturned Nostepinnes in my ArtFire store. www.curiosities808.artfire.com

Your life needs fun. Go ahead, have some fun! –

smiles,
alicia in Hawaii

Leave a comment

Filed under knitting, Nostepinne, Nostepinne, Spinning, Tools, tutorial, Wind Center Pull Yarn Ball

Tutorial-Embroidery Tools–The Sulky Hot Iron Transfer Pen–Creating Iron On Transfers-Tarot Card Purse Panel

Here is another tutorial about creating Iron On Transfers. This is how I have created hot iron transfers with the Sulky Hot Iron Transfer Pen.

1. Have a pattern image. Copy the image onto plain printing paper. You can even enlarge or reduce the image size!

For this project, I want to create an embroidery panel for a purse using a  card that my husband created. He made a deck for me a few years back and this card is one of my favorites. It shows both of us and our little Jack Russell Terrier, Mr. MacKenzie.

I copied the card image with my computer printer. For this one, I even ENLARGED the original image to get the size that I want for the purse panel.

**********************************************

2. Get a hot iron transfer pen…and an iron.

This is a brown Sulky hot iron transfer pen. I used to buy mine at Joggles.com, but they no longer carry them. If you know of a good place to buy this pen online, please share your source with me.

The iron will come into play later. 😉

*******************************

3. Trace your design on the reverse side with your hot iron transfer pen.

I flip the printed paper over and use my cutting mat as a solid surface since light can travel through the plastic. You can see here that the design is visible and easily traceable when I hold the mat and the reversed sheet up to the door.

After you have the entire design traced out…go on to #4.

********************************

4. Place the pattern image, hot iron PEN SIDE DOWN onto your fabric. Just decide where you want it to be…and get ready!

*************************************

5. Press with hot iron. Set your iron to the cotton setting. (That is the setting that I usually use…unless the fabric is some type that will not survive the heat.)

*****************************************

6. Leave iron placed on the transfer. Peek under a corner to see if the transfer is done.

*******************************

7. The transfer is done.

You’ve created a Hot Iron Transfer for embroidery…or for just about anything!

Let the embroidery begin!

Your life needs fun. Go ahead, have some fun! –
smiles,
alicia in Hawaii

3 Comments

Filed under Bags/Purses, Iron On Transfer, Projects, Tarot Card Purse, Tools, tutorial

Tutorial/Embroidery Project – Small Snail Purse/Bag with Vintage Snail Embroidery, Turning a Reversible Purse/Bag Part 17

Yesterday, we left the snail bag with this little hole in the handle and are now expected to turn this little baby inside out.

What we need to do is:

Stick our fingers into the hole…

Grab some fabric…any really easy to grasp fabric you can get is good…we don’t want to be picky, we want this to be easy…

Then…pull it through the hole.

[While I was doing all this, it was rather dark in the room (it was late evening already) and it was a mess…the photos didn’t come out clear enough to actually SEE anything…]

But, I can describe this:

The first little bits of fabric you “pull through” this little hole can just be pulled ‘a little more’…then ‘a little more’…and ‘a little more’ until we can get our fingers back into the hole and kind of take little grabs at the fabric until it all turns itself inside out in one wild mess! 😉

Here we can see that no part of the purse is left unscathed. It all comes through mashed up and a wrinkled mess! [I play the Great Highland Bagpipes and it sure reminds me of a pipe bag and the stock chanters! ;)]

The entire bag came through that handle. Really. It did.

Now, we push the lining down into the bag.

Here’s that wonky “V” or “U” seam that we had to deal with when we were sewing down the side seam for the handle. That little trick to “imagine the seam is whole” worked out well! (See yesterday’s post)

The same seam from the inside.

Now we deal with the handles.

Match up the pairing sides; long with long and short with short.

Now we are off to sew the handles and straighten out the purse!

Your life needs fun. Go ahead, have some fun!

———–Helpful Information———

Find Small Snail Purse/Bag with Vintage Snail Embroidery Part 1 (Click Here)

Find Small Snail Purse/Bag with Vintage Snail Embroidery Part 2 (Click Here)

Find Small Snail Purse/Bag with Vintage Snail Embroidery Part 3 (Click Here)

Find Small Snail Purse/Bag with Vintage Snail Embroidery Part 4 (Click Here)

Find Small Snail Purse/Bag with Vintage Snail Embroidery Part 5 (Click Here)

Find Small Snail Purse/Bag with Vintage Snail Embroidery Part 6 (Click Here)

Find Small Snail Purse/Bag with Vintage Snail Embroidery Part 7 (Click Here)

Find Small Snail Purse/Bag with Vintage Snail Embroidery Part 8 (Click Here)

Find Small Snail Purse/Bag with Vintage Snail Embroidery Part 9 (Click Here)

Find Small Snail Purse/Bag with Vintage Snail Embroidery Part 10 (Click Here)

Find Small Snail Purse/Bag with Vintage Snail Embroidery Part 11 (Click Here)

Find Small Snail Purse/Bag with Vintage Snail Embroidery Part 12 (Click Here)

Find Small Snail Purse/Bag with Vintage Snail Embroidery Part 13 (Click Here)

Find Small Snail Purse/Bag with Vintage Snail Embroidery Part 14 (Click Here)

Find Small Snail Purse/Bag with Vintage Snail Embroidery Part 15 (Click Here)

Find Small Snail Purse/Bag with Vintage Snail Embroidery Part 16 (Click Here)

Find Sue of Berkshire Cottage (Click Here)

Find Helen of Show Your Workings (Japanese Knot Bag Tutorial) (Click Here)

Find My “Tinting Fabric with Crayon” Tutorial (Click Here)

Find My Iron On Transfer Tutorial (Click Here)

Find Flickr Group Hoop Love Vintage Transfers (Click Here)

Find Yahoo!Group Hand Embroidery (Click Here)

Find Hand Embroidery Group Blog (Click Here)

Find Hand Embroidery Group Summer Creativity Challenge (Click Here)

Find Stitchy Britches Blog (Click Here)

Leave a comment

Filed under Bags/Purses, embroidery, felt, Tint with Crayon, tutorial

Tutorial/Embroidery Project – Small Snail Purse/Bag with Vintage Snail Embroidery, Sewing the Japanese Knot Bag, front to back, Part 16

Yesterday, we got the circle shaped bottom of the bag sewn into the purse tube of the Japanese Knot Bag. Here are the results with the extra piping added in for some fun.

After learning about this Japanese Knot Bag I saw many versions of it and read many comments about it. One recurring comment dealt with not understanding the instructions. I am hoping that by taking the time to show the step by step procedures to construct and assemble this bag, the instructions for the Japanese Knot Bag will be a little clearer and maybe easier to follow. Hopefully it will clear up any questions about construction. 😉

Now that the circular bottom is sewn on, the outer shell of the purse is done, for now.

The next stop: sewing the inner lining.

Fortunately, the inner purse is made from the exact same pattern as the outer purse and follows the exact same construction.

The instructions for the purse say:

“Step three

Take the 2 main pattern pieces of outer fabric and place them together right sides facing. Mark with chalk or pencil on the fabric at the point of the join in the paper pattern. This is the point you will sew to on the side seams, sew from the bottom up to the marked point on each side. Repeat for the lining.”

Here are the sides, placed together right sides facing. See where the pins are?

I placed my pins at the “join in the paper pattern”. Now, we sew from there down to the bottom for the side seam. This will leave the handles are flappy and unattached just like out outer purse fabric.

Moving on in the pattern directions we read:

Step four

Take your base pieces, you may want to contrast the base by swapping around the lining and outer fabric. Pin the base to main body and sew around, repeat for lining. You should now have two pieces that look like bags without the handles joined.”

*I did NOT post a separate photo of the circular bottom of the lining being sewn is because yesterday’s post covered that in detail. We can check back there for the information.*

At this point we have an exact replica in shape, form and construction of the outer purse.

From the purse directions we read:

Step five

Slip the outer fabric bag into the lining with the right sides facing, sew the outer fabric and the lining together along the sides of the handles, leave the tops of the handles unsewn. Turn the bag right-side out through the top of one handle.”

Whew! Well, of all the ‘steps’ this one is a handful! Let’s see what this looks like bit by bit. It is here that we encounter some tricky little glitches in the construction.

“Slip the outer fabric bag into the lining with the right sides facing,” – The first thing is getting the outer purse INTO the lining; RIGHT sides together. Here you can see the lining, in the exact same position as the last photo above. It looks as though you are already looking into the bottom of the bag. The outer purse is RIGHT side out. We can see the snails as though they are the purse already done and ready to go. Stuff the outer purse into the lining and match up the handles. Yes, this can feel truly weird to do, but really, it will work out. 😉

We want to match up the fabric for the handles. Let’s do the side of the handle that requires us to sew toward the side seam. This side of the handle is the trickiest of the set. Here you can see how they match up. I don’t like to pin on too many pins.

If you get the corners to match, set a pin, get the side seams of the purse to match, set a pin on either side of the seam, and get at least one ,maybe two, pins between those two spots, you will have enough ease to help you sew in a neat, tidy seam.

Here you can see where our tricky spot is at the side seams of the purse. Right here, it seems as though we ‘don’t have enough material to fill the seam’. This is how we are going to get the ‘turn’ or ‘curve’ of the handle to sew in straight, by matching the side seams, pinning to the left and right of the seam and ‘imagining’ that the little space there that we see, well…we are going to pretend it isn’t there. 😉

“sew the outer fabric and the lining together along the sides of the handles, leave the tops of the handles unsewn.” We start at the top of one handle, on the side that we just pinned. I like to use the foot to gauge my seams so here you can see I’ve lined the right edge of the fabric up to the right edge of the foot. (I don’t run over my pins by the way. I pull them out as I come to them.) Sew down this straight way until we get to that tricky side seam. Leave the first 1/4 in. UNsewn at the top.

As we approach it, notice I have to use 4 fingers to keep the fabric in place. I pinch the fabric that is being fed under the foot with my pointer and thumb. This keeps a certain ‘tension’ on the fabric as it feeds into the machine.

Here you can see the ‘imaginary’ seam line it passes the ‘gap’ of that tricky side seam. If we ‘imagine’ that to be the seam line and connect the blue section to the upcoming blue section, then we will sew, over the gap and go on.

Here is that view again, at a different angle. Notice, again, I have to use all 4 fingers to keep the fabric where I want it while I sew this section. (And take the photo of course, but even without the camera, this is where the tension is tightest on both my grip of the fabric and the feed into the machine.)

Sew over that gap and up to the other end of the handle. Leave the last 1/4 in. of the handle UNsewn.

*SNEAK PEEK* What we are sewing that is so ‘tricky’ is the “V” or “U” at the handle intersections from front to back. Here you can see what that ‘gap section’ looks like turned right sides out. In this photo I am having to really pull the fabric and stretch the material in place to show the way the seam will eventually lay on the outside of the purse. As we see the “V” or “U” area, it goes in straight and seems to make a sharp, deep turn to come back up the other side. That ‘dip’ is the ‘gap’ that we saw on the inside. 😉

Now that the side seams of the handles are done, we just have to finish the other seams of the handles. Again, match the corners on both sides, place pins, then match the center ‘dip’ there where the dip is at the lowest, place a pin, then match add one or two pins between those guide pins to ensure ease matches up for a tidy, neat seam. Again, leave the first and last 1/4 in. UNsewn.

And here is our beautiful purse?! From the top…

from the bottom… Well, it’s done. It’s just INSIDE OUT!

Remember the top of the handles? Recall our directions…“Turn the bag right-side out through the top of one handle.”Um, yeah,…right?! See that little space where we left the top of the handles UNsewn? We are going to pick ONE of the handles and we are going to turn the entire bag right side out through that hole. Yes. I know… ever witness childbirth? It’s kind of the same idea. LOL

Tomorrow we will get this baby to turn INSIDE OUT through this little tiny hole at the top of this handle. Really. We will. 😉

Your life needs fun. Go ahead, have some fun!

———–Helpful Information———

Find Small Snail Purse/Bag with Vintage Snail Embroidery Part 1 (Click Here)

Find Small Snail Purse/Bag with Vintage Snail Embroidery Part 2 (Click Here)

Find Small Snail Purse/Bag with Vintage Snail Embroidery Part 3 (Click Here)

Find Small Snail Purse/Bag with Vintage Snail Embroidery Part 4 (Click Here)

Find Small Snail Purse/Bag with Vintage Snail Embroidery Part 5 (Click Here)

Find Small Snail Purse/Bag with Vintage Snail Embroidery Part 6 (Click Here)

Find Small Snail Purse/Bag with Vintage Snail Embroidery Part 7 (Click Here)

Find Small Snail Purse/Bag with Vintage Snail Embroidery Part 8 (Click Here)

Find Small Snail Purse/Bag with Vintage Snail Embroidery Part 9 (Click Here)

Find Small Snail Purse/Bag with Vintage Snail Embroidery Part 10 (Click Here)

Find Small Snail Purse/Bag with Vintage Snail Embroidery Part 11 (Click Here)

Find Small Snail Purse/Bag with Vintage Snail Embroidery Part 12 (Click Here)

Find Small Snail Purse/Bag with Vintage Snail Embroidery Part 13 (Click Here)

Find Small Snail Purse/Bag with Vintage Snail Embroidery Part 14 (Click Here)

Find Small Snail Purse/Bag with Vintage Snail Embroidery Part 15 (Click Here)

Find Sue of Berkshire Cottage (Click Here)

Find Helen of Show Your Workings (Japanese Knot Bag Tutorial) (Click Here)

Find My “Tinting Fabric with Crayon” Tutorial (Click Here)

Find My Iron On Transfer Tutorial (Click Here)

Find Flickr Group Hoop Love Vintage Transfers (Click Here)

Find Yahoo!Group Hand Embroidery (Click Here)

Find Hand Embroidery Group Blog (Click Here)

Find Hand Embroidery Group Summer Creativity Challenge (Click Here)

Find Stitchy Britches Blog (Click Here)

13 Comments

Filed under Bags/Purses, embroidery, felt, Tint with Crayon, tutorial

Tutorial/Embroidery Project – Small Snail Purse/Bag with Vintage Snail Embroidery, Sewing a Circle into a Tube, Part 15

Whew! Many parts to building this little snail bag…but it’s been really fun to create and very satisfying to see it come to life. It’s become so much more than I ever thought it would be when I first envisioned it in Part 1, the “idea” stage.

Today, I hope this tutorial will help anyone trying to sew a circle into a ‘tube’ end. This is similar to sewing a sleeve into a armhole…and yes, I’ve done that a few times and have learned some tricks to help keep the sewing neat and the ‘ease’ even.

Yesterday’s post showed the basic set up. Again, I don’t ever pin completely around the piece. I find that by pinning only the 4 quarter sections, the ‘ease’ you sew into each section is more even and the sewing is completed clean and neat. [I think of the ease as -the stuff that has to fit together, no matter what, between those pins-]

The basic idea when sewing this is…you MUST fit all the fabric neatly together, EXACTLY-with no bunching and puckering- from pin-to-pin. When you do that, you will have a neat and tidy finish. 😉

Match your sewing top thread to your circle piece. I always put the circle piece on the topside because it is the shape that you are trying to ‘ease’ into the ’empty space’ of the tube, so to speak. Here we have bright pink top thread and an apple green bobbin thread. [The bobbin box is now infamous…it’s the bobbin box hubby made to keep all the bobbins in, neatly sitting sideways. The heart is his add-on note to just about everything he makes for me. *it’s cute, eh?* See the wonderful tape marks on the sewing machine? That is a remnant of a marker to gauge a very deep seam that went around a blanket, or a halloween costume, or a wizard robe…or something that we made a while back. 😉 ]

And just to prove that this sewing can be done even with a rather mediocre machine, here is a photo of our handy-dandy sewing machine. Not just a straight and zigzag stitch, but still rather simple and mechanical. It was nowhere near the top end, or middle for that matter I guess, and not the very bottom end machine, but it’s been a work horse. Both hubby and I sew on it. (Yes, hubby sews. Very well indeed. He says it is just another power tool to learn to use. He’s made quite a few wonderful things on it…like that blanket, wizard’s robe and halloween costume, I mentioned: thus the use of the tape on the machine. lol)

Speaking of tape, this machine has gone through so much that the foot pedal has to be taped in to stay ‘connected’. lol Here you can see our ‘fix’ for that. This machine survived Hurricane Katrina too. We rescued it from our house after returning to find all our things flooded and covered in mold. This machine is a real trooper!

Back to the sewing… We’ve got all the parts sandwiched together and ready to place on the machine. Start a ‘seam’ spot, meaning: a place where the seam of the tube and one pin match up. Place that under your presser foot, put the foot down at your gauged seam allowance and bring the needle down into the fabric. Now you KNOW that spot is secure and the fabric sandwich isn’t going anywhere. Remember, You Are In Charge! Let that fabric know it.

I couldn’t keep taking pictures from pin to pin, but this one photo shows the ‘form’ for getting from one pin to another. You are started. Your foot is down, needle down. What you need to do is: take up the ease from one pin to the other. Translated that means, do whatever you have to to ‘hold the fabric out until it matches’. See my pointer finger and my middle finger there in the picture? My pointer is pinched with my thumb at the next ‘pin stop’. My middle finger is holding some ‘tension’ on the fabric being fed into the machine. Sew this VERY VERY SLOWLY. If you have to stop to adjust any fingers or scratch your nose, or anything for any reason, always stop with the needle DOWN into the fabric and leave the foot down. That way you will always reign over the fabric. It doesn’t have a chance to get wiggy and move around on you. See how I have used my middle finger there to make sure the top fabric matches and stays matched to the bottom fabric? That is what you do. And…all you have to ‘think’ about is making it to the next pin. Take it one pin at a time.

Here, we are at the last pin. Because we added the extra ‘bling’ of piping, we will have to do some tricks to ‘finish’ the ends before getting to the last and final end point, the beginning of the sewing.

Over lap the piping and cut it, leaving enough past the final seam to fold it back on itself.

To reduce bulk, we will have to pull some of the cord out of the piping case. (Notice the foot is still down on the machine and the needle is in the fabric. I am still the boss of this fabric sandwich! 😉 )

I’ve folded back the beginning piping tape and ending piping tape.

Here you can see it a little better in the blown up picture. (Click on the photo) Both ends of the piping are folded back over themselves and one side overlaps the other. The piping is sandwiched back into the fabric, and you can still see that my pointer and thumb have the fabric pinched while my middle finger is guiding the pink circle top fabric to stay even on the edge with the green fabric laying under the entire sandwich.

Once that ending part is sewn and backstitched a bit, we turn it to find this. See the little overlap there in the piping? It’s pretty neat and does that job. I’m happy with it.

Here are a few photos of the circle bottom now sewn into the tube, complete with some piping ‘bling’. 😉

Next stop, the lining of the purse and putting the lining and the outer purse fabric together. That has ONE really, really tricky part to it…turning it right side out! Stay tuned to learn how that’s done!

Your life needs fun. Go ahead, have some fun!

———–Helpful Information———

Find Small Snail Purse/Bag with Vintage Snail Embroidery Part 1 (Click Here)

Find Small Snail Purse/Bag with Vintage Snail Embroidery Part 2 (Click Here)

Find Small Snail Purse/Bag with Vintage Snail Embroidery Part 3 (Click Here)

Find Small Snail Purse/Bag with Vintage Snail Embroidery Part 4 (Click Here)

Find Small Snail Purse/Bag with Vintage Snail Embroidery Part 5 (Click Here)

Find Small Snail Purse/Bag with Vintage Snail Embroidery Part 6 (Click Here)

Find Small Snail Purse/Bag with Vintage Snail Embroidery Part 7 (Click Here)

Find Small Snail Purse/Bag with Vintage Snail Embroidery Part 8 (Click Here)

Find Small Snail Purse/Bag with Vintage Snail Embroidery Part 9 (Click Here)

Find Small Snail Purse/Bag with Vintage Snail Embroidery Part 10 (Click Here)

Find Small Snail Purse/Bag with Vintage Snail Embroidery Part 11 (Click Here)

Find Small Snail Purse/Bag with Vintage Snail Embroidery Part 12 (Click Here)

Find Small Snail Purse/Bag with Vintage Snail Embroidery Part 13 (Click Here)

Find Small Snail Purse/Bag with Vintage Snail Embroidery Part 14 (Click Here)

Find Sue of Berkshire Cottage (Click Here)

Find Helen of Show Your Workings (Japanese Knot Bag Tutorial) (Click Here)

Find My “Tinting Fabric with Crayon” Tutorial (Click Here)

Find My Iron On Transfer Tutorial (Click Here)

Find Flickr Group Hoop Love Vintage Transfers (Click Here)

Find Yahoo!Group Hand Embroidery (Click Here)

Find Hand Embroidery Group Blog (Click Here)

Find Hand Embroidery Group Summer Creativity Challenge (Click Here)

Find Stitchy Britches Blog (Click Here)

7 Comments

Filed under Bags/Purses, embroidery, felt, Tint with Crayon, tutorial